Using Vim as a dedicated note taking application
Last post update: 2018-06-08 15:06:31
Do you like and use Vim, but need a separate note taking application which will not interfere with you main Vim setup? If yes, then this post might be useful to you as it describes all the steps required to configure your existing Vim installation as a separate note taking application.
vimwiki plugin will be used for note editing. It provides lots of very nice features simplifying note organization, todo-list management and other tasks.
If you are not using a Vim plugin manager, then download the zip archive and extract it in ~/.vim/bundle/.
If you are using vim-plug, then the installation is done by adding the following code to ~/.vim/_vimrc file:
call plug#begin()
Plug 'vimwiki/vimwiki', { 'branch': 'dev' }
call plug#end()
Create ~/.vim/notes.vim file with the following code:
for server in split(serverlist(), '\n')
    if server =~? "^NOTES\\d*" && server != v:servername
        call remote_foreground('NOTES')
        quit
    endif
endfor
let $VIMHOME = expand('<sfile>:p:h')
let g:vimwiki_list = [{'path': '$VIMHOME/wiki/src', 'path_html': '$VIMHOME/wiki/html'}]
source $VIMHOME/_vimrc
set titlestring=Notes
autocmd FileType vimwiki autocmd BufWritePost <buffer> silent Vimwiki2HTML
autocmd VimEnter * cd $VIMHOME | VimwikiIndex
This code checks if another note editor instance is running and brings existing window to foreground instead of opening a second window. Storage path for note files and generated HTML output is set to ~/.vim/wiki/. Existing Vim configuration is sourced and initial note is opened on startup. An auto command is also set to generate a HTML page on note save.
Add desktop file describing our note editing application. Create ~/.local/share/applications/notes.desktop file with the following contents:
[Desktop Entry]
Name=Notes
Comment=Note editor
TryExec=gvim
Exec=gvim -f -g --servername Notes -u ~/.vim/notes.vim
Terminal=false
Type=Application
Icon=gvim
Categories=Utility;TextEditor;
StartupNotify=true
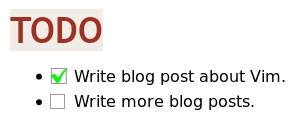
You should now have a fully functional note editor called Notes in your application menu. Run it and write some text. For example a todo list:

After saving, a generated HTML file will be created in ~/.vim/wiki/html/. You can open it with your favorite web browser and should see a result similar to this: